> ## Documentation Index
> Fetch the complete documentation index at: https://kwala.network/docs/llms.txt
> Use this file to discover all available pages before exploring further.
# Create workflow
> Learn how to create a new workflow in Kwala
This guide walks you through creating a new workflow using the Kwala Workflow Builder. The visual builder provides a form-based interface that generates YAML automatically, making it easy to configure triggers, actions, and execution settings without writing code.
## Prerequisites
Before creating a workflow, ensure you have:
* A connected Web3 wallet such as MetaMask
* Kwala credits in your account
* Deployed smart contracts if your workflow monitors contract events or executes contract functions
## Create a new workflow
Navigate to the [Kwala dashboard](https://app.Kwala.network/dashboard) and sign in with your connected wallet.
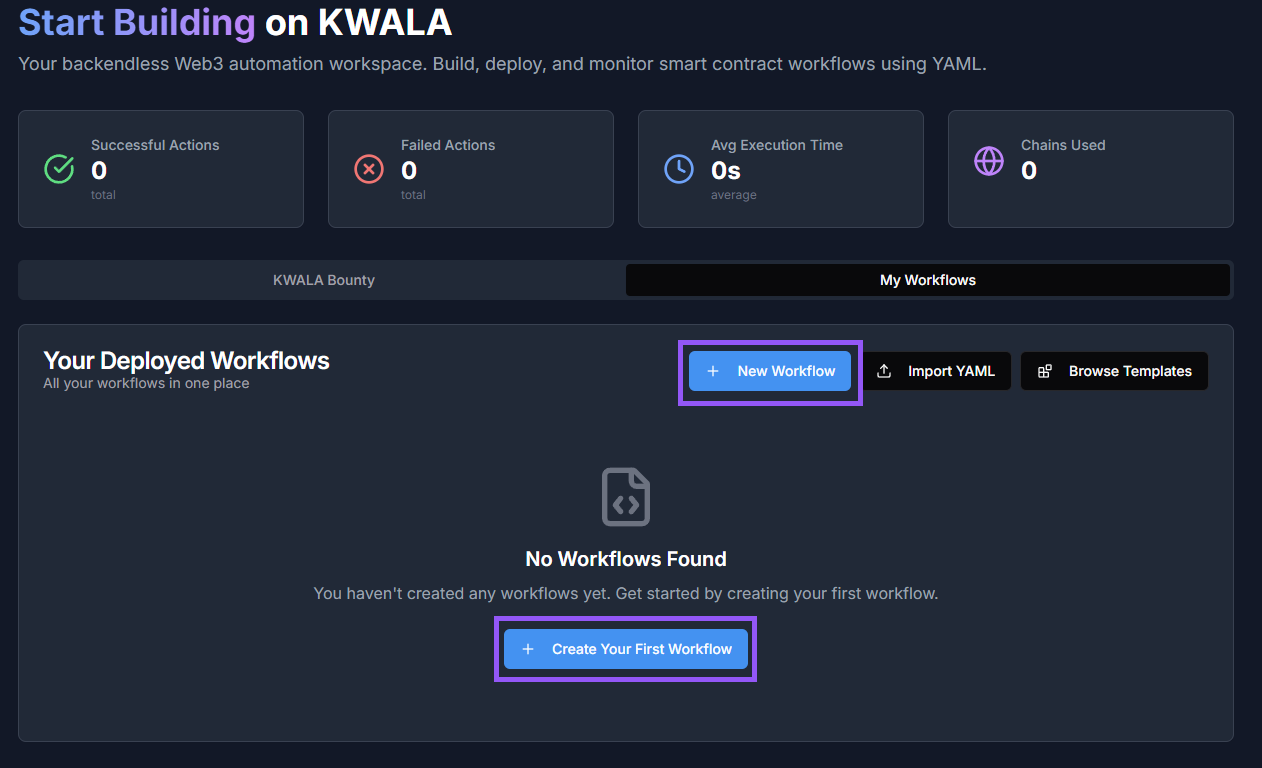
Select **New Workflow** or **Create Your First Workflow** button on the dashboard.
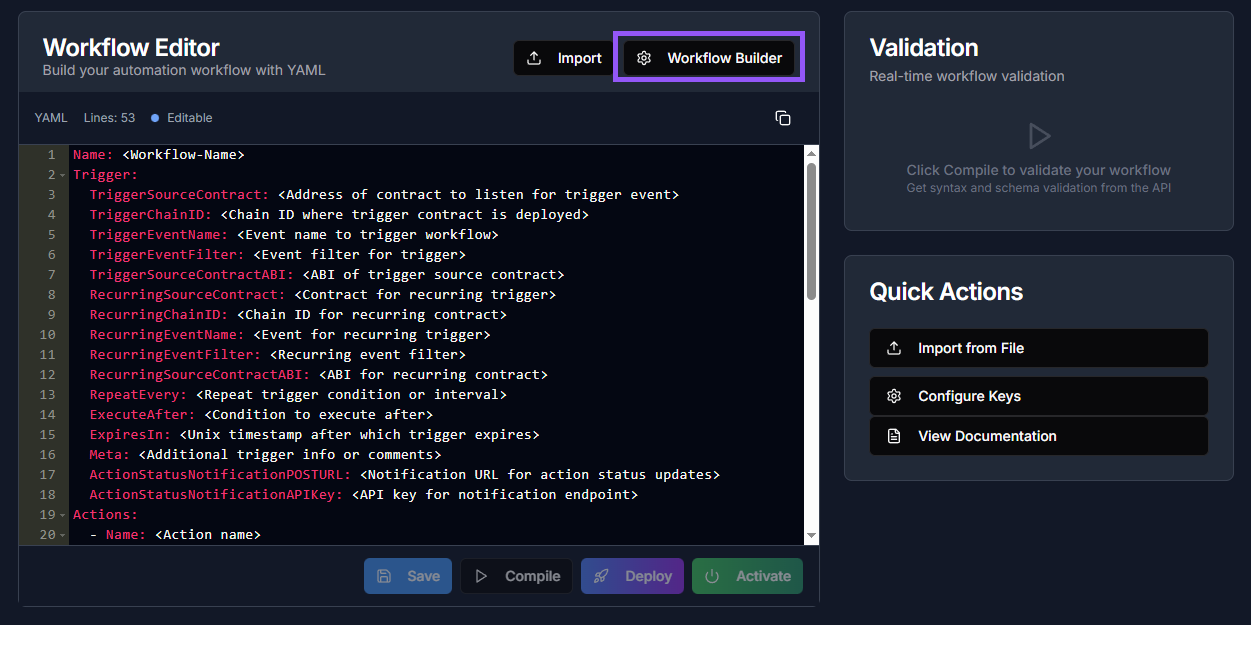
 You'll be redirected to the Workflow Editor. Select **Workflow Builder** in the top right of the navigation menu to open the visual builder.
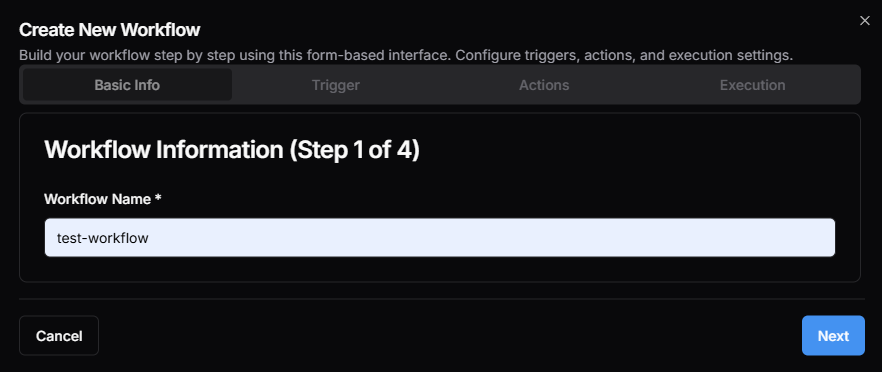
 A new window opens where you can visually build your workflow step by step using the form-based UI.
Start by providing basic information about your workflow:
* **Workflow name**: Enter a descriptive name that identifies your workflow's purpose
Select **Next** to continue.
A new window opens where you can visually build your workflow step by step using the form-based UI.
Start by providing basic information about your workflow:
* **Workflow name**: Enter a descriptive name that identifies your workflow's purpose
Select **Next** to continue.
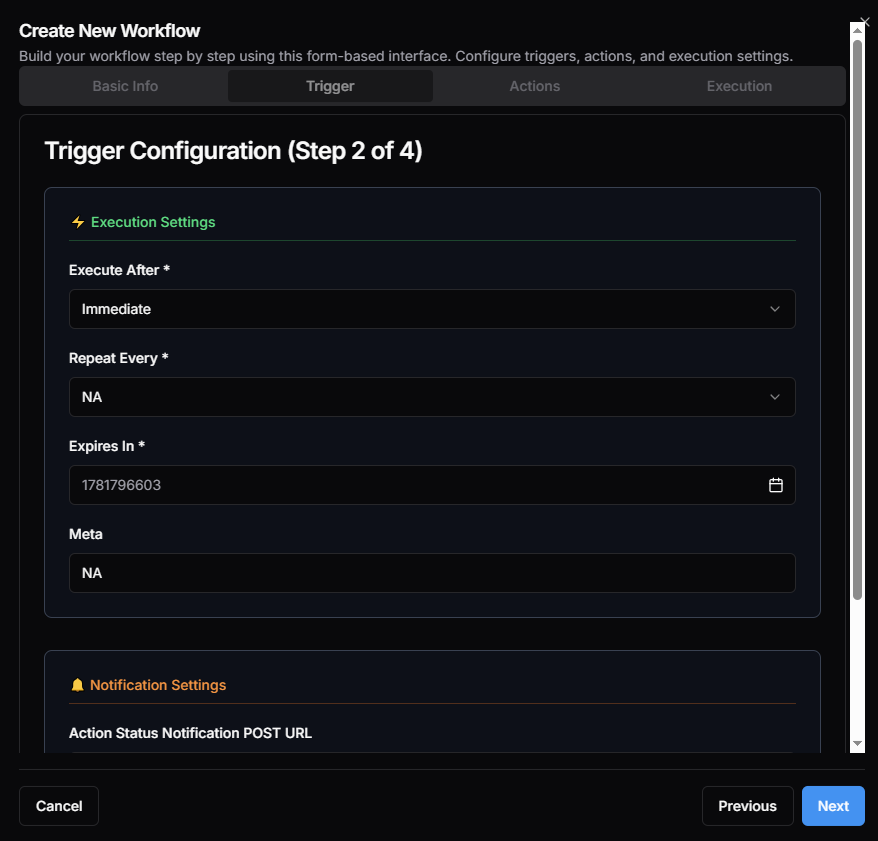
 Next, configure your workflow's triggers and actions:
* **Triggers**: Define when your workflow should activate.
* **Actions**: Specify what your workflow should do when triggered (up to 10 actions)
* **Execution mode**: Choose sequential or parallel execution
Next, configure your workflow's triggers and actions:
* **Triggers**: Define when your workflow should activate.
* **Actions**: Specify what your workflow should do when triggered (up to 10 actions)
* **Execution mode**: Choose sequential or parallel execution
 For detailed configuration options, see [Configure workflow](/workflow-builder/configure-workflow).
## Next steps
Set up triggers, actions, and execution mode
Start with pre-built templates
For detailed configuration options, see [Configure workflow](/workflow-builder/configure-workflow).
## Next steps
Set up triggers, actions, and execution mode
Start with pre-built templates